

How To Stretch A Canvas For Painting
How to stretch a canvas and set up for oil paints
Welcome to our guide to how to stretch a canvas and set up for oil paints. By stretching your own canvas you can save a lot of money. Learning to do so isn't hard, but it takes a little practice to do it consistently. We recommend investing in a good pair of canvas pliers and an electric or pneumatic stapler to achieve consistent quality results.
For more on oil painting, here are the oil painting techniques you need to know, plus the best oil paints to work with. Does your drawing need a little work? Our pick of the best how to draw tutorials contains all you need.
What to consider before getting started
Cotton canvas, linen, wood panels, copper, paper, glass and stone are just some of the surfaces you can create oil paintings on. Cotton is a cheap alternative to linen, but is less durable and not as strong.
Canvas, linen and panels are the most commonly available primed and unprimed surfaces. Priming your own can give you a lot of control, and it is another chance to save money and you can create textures that add to your painting.
One option is to use a grid to transfer your drawing to the canvas or panel. Projectors and carbon paper are great tools, as long as they aren't replacements for time spent developing your drawing skills. Once your drawing is accurate, ink or fix it, so that when you begin painting you won't scrub out all your hard work!
Read on to find out how to stretch your canvas and set up for oil paints.
01. Stretch your canvas
(Image: © Howard Lyon)
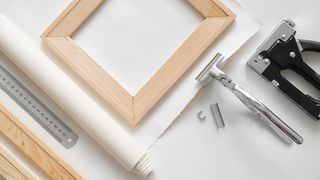
Cut your canvas with between two and two and a half inches overlap of stretcher bars, then place a few staples in the middle of one side and stretch the opposite side. Move to the other sides and repeat. Work from the middles to the corners.
02. Use gesso panels and canvas
(Image: © Howard Lyon)
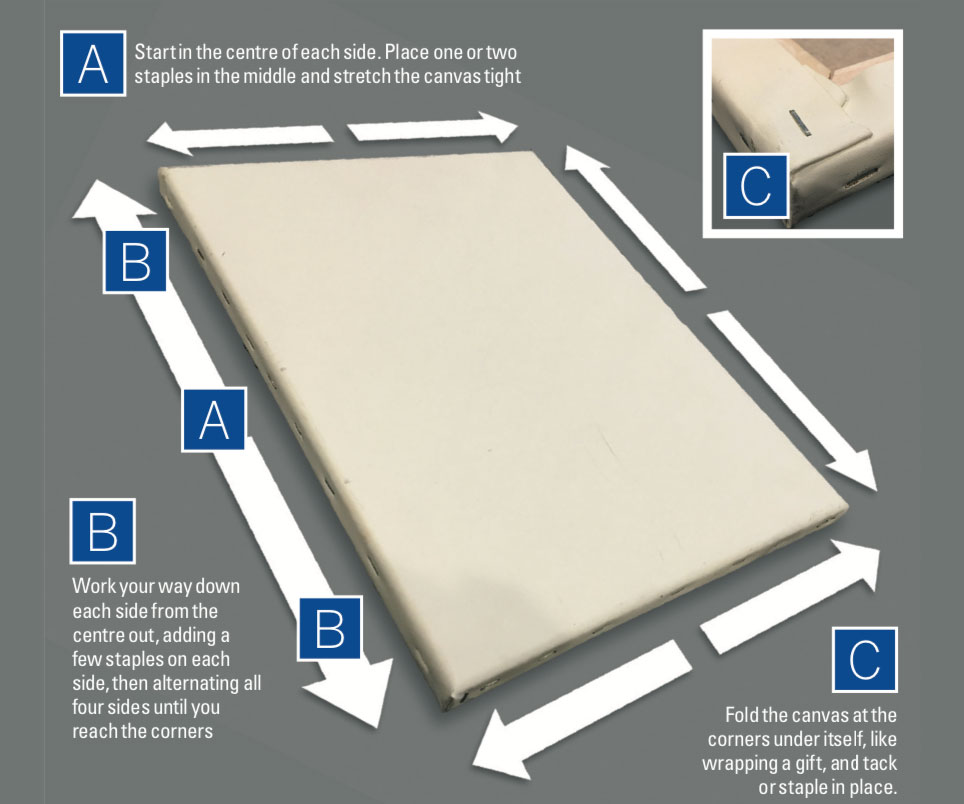
Oil-based gessoes on canvas require sizing before applying. Rabbit skin glue is traditional, but you can use GAC 100 or PVA size, too. Acrylic gessoes and pastes don't require sizing and can be applied directly. Brushes, rollers and trowels are all useful for gessoing.
Remember:
- Thicker gessoes can be applied with a spatula (above top)
- Putty and spackling knives are handy for producing a variety of textures when applying heavier acrylic gels and pastes (above middle)
- Standard house painting brushes are cheap and excellent for applying gessoes (above, bottom-right)
03. Gather the best reference
(Image: © Howard Lyon)
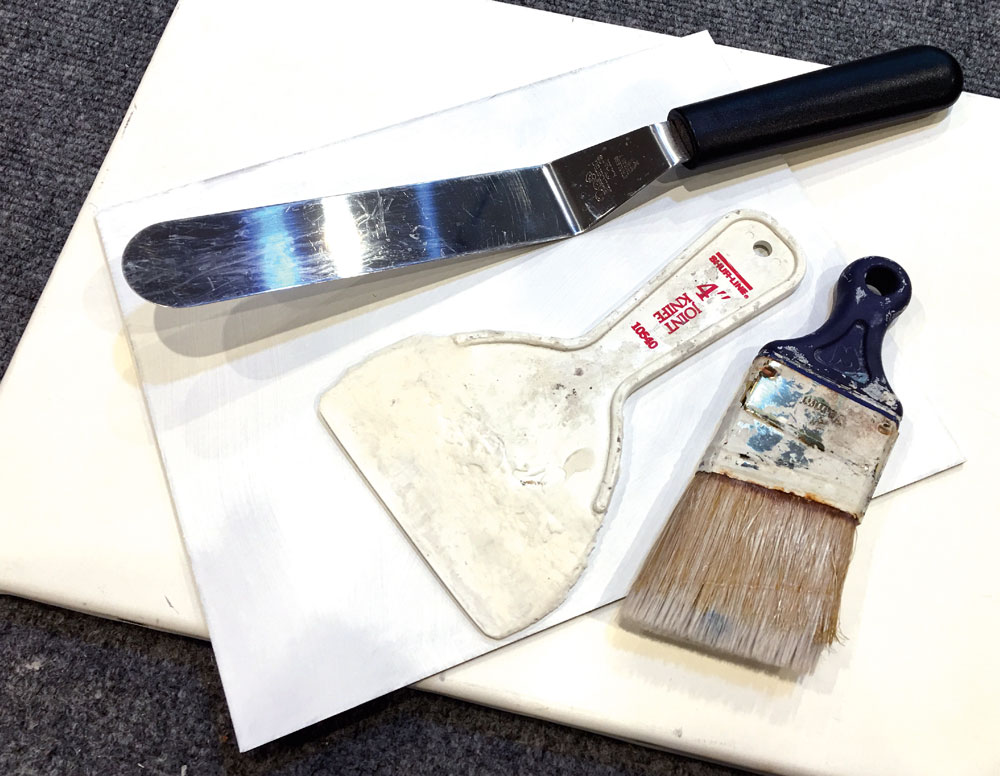
Take the time to learn how to use your camera. One of the biggest issues can be terrible reference that handicaps the work. Learn to make costumes and create models for reference. This is an invaluable and fun part of the process.
Building models is a great way to get realistic reference when you don't have access, due to size or availability. You should start collecting interesting objects whenever you can. Thrift stores and garage sales are often full of cheap and interesting objects. And be sure to keep some clay around in case you need to sculpt a quick head or figure for imaginary subjects.
04. Transfer a drawing
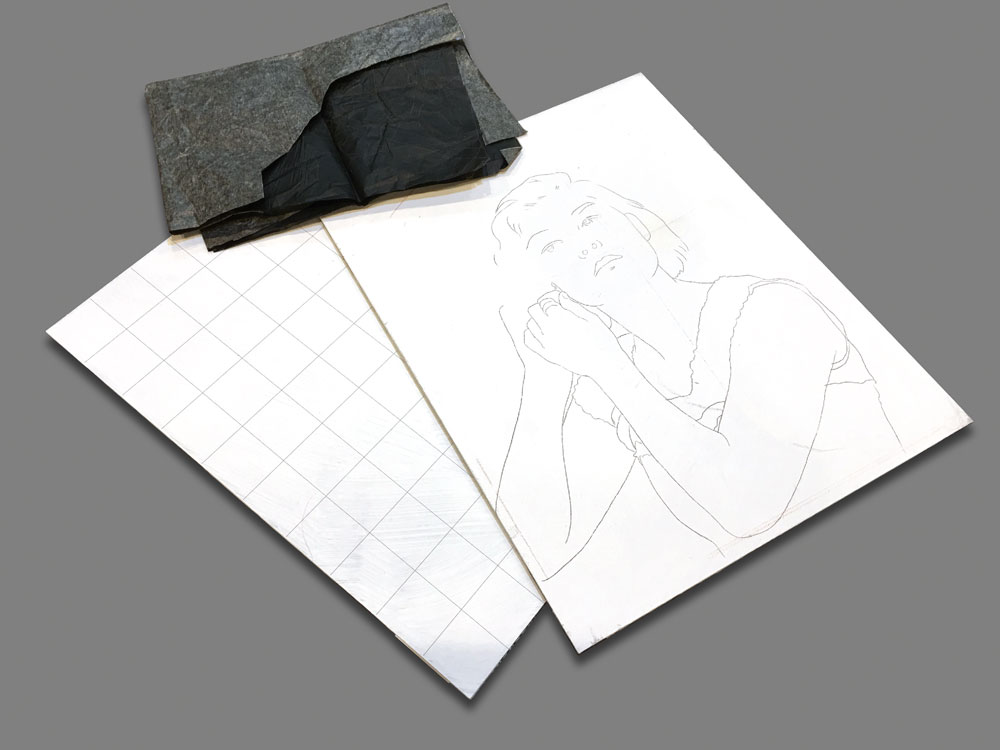
(Image: © Howard Lyon)
Take your time when transferring your final drawing. A strong drawing is the basis of any good painting, so don't rush through this stage and have your work suffer. A grid is the best method because it'll reinforce your drawing skills. A grid is a useful drawing aid. Put a grid of the same ratio on your reference and on your panel or canvas, and it'll make it easier to create accurate transfers.
Carbon paper is a useful tool. Projectors work well, too. There's no cheating, but if you're using it as a crutch then you're robbing yourself of a chance to develop your skills. Remember, charcoal pencil works well when drawing directly on a panel or canvas. Once that's done, you can ink the drawing with India ink and erase any lines you don't need.
05. Secure your drawing
(Image: © Howard Lyon)
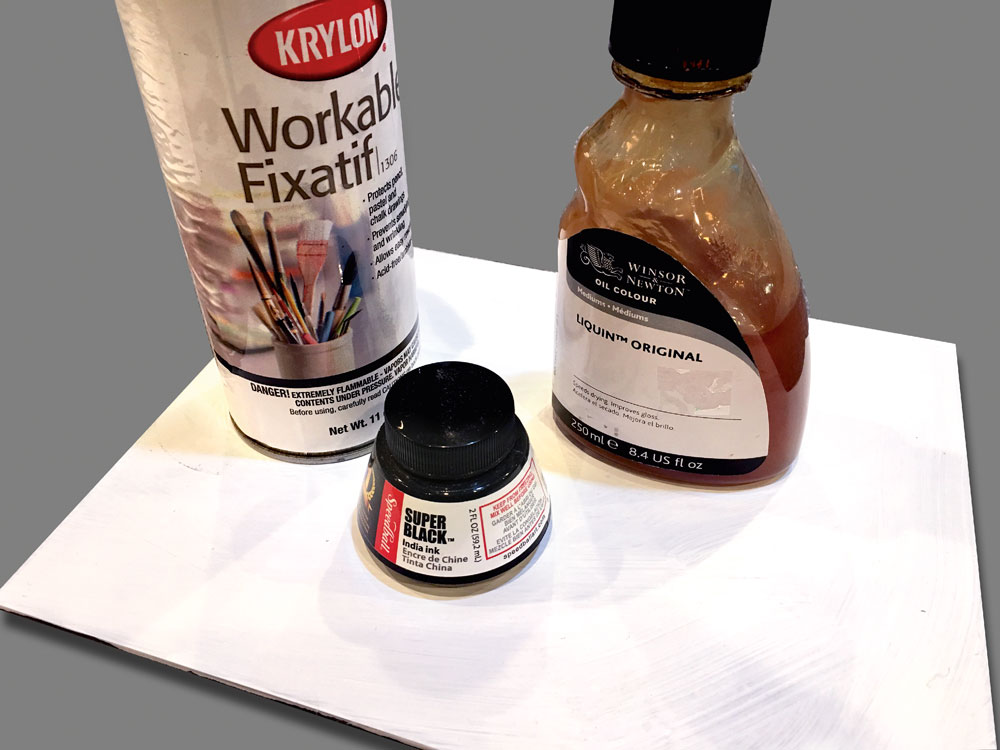
Once your drawing is done, it's a good idea to make sure that it's secured so that when you paint, it won't dissolve or smear. Try going over your drawings with India ink (above, bottom). Its permanent and durable, and enables you to scrub in paint or wipe off paint, and not remove the drawing.
Spray fixative (above left) is an easy way to make sure your drawing doesn't bleed through or disappear when painting. Use Liquin (above right) to apply a colour wash directly over a drawing. If you don't scrub hard with brushes, it'll preserve your drawing underneath without the need for a fixative.
This content originally appeared in Paint & Draw: Oils. You can buy the Oils bookazine here . Or explore the rest of the Paint & Draw bookazines .
Read more:
- How to paint sunsets: Create the perfect coloured sky
- How to capture the light with oils
- How to get started with oil painting
Howard has worked in the video game industry as a concept artist and art director. He has also freelanced on properties like Magic: the Gathering and Warcraft, as well as a fine artist for galleries.
Related articles
How To Stretch A Canvas For Painting
Source: https://www.creativebloq.com/how-to/canvas-stretching
Posted by: walkergeop1953.blogspot.com
0 Response to "How To Stretch A Canvas For Painting"
Post a Comment